Abstracting components and building them into Unity assets.

Written by Michael on October 18, 2015
Large games in Unity tend to have a lot of code, the more code you have, the harder it is to keep track of side effects. I had first hand experience in this when the social media sharing functionality stopped working in a game I was building with friends.
After reflecting on ways to stop this from happening again, I decided to abstract generic components out into Unity packages. Some of the benefits of this approach include reusability for other games and the ability to open source or sell these components. I chose to open source in the hope to educate other Unity developers in writing cleaner more composable code.
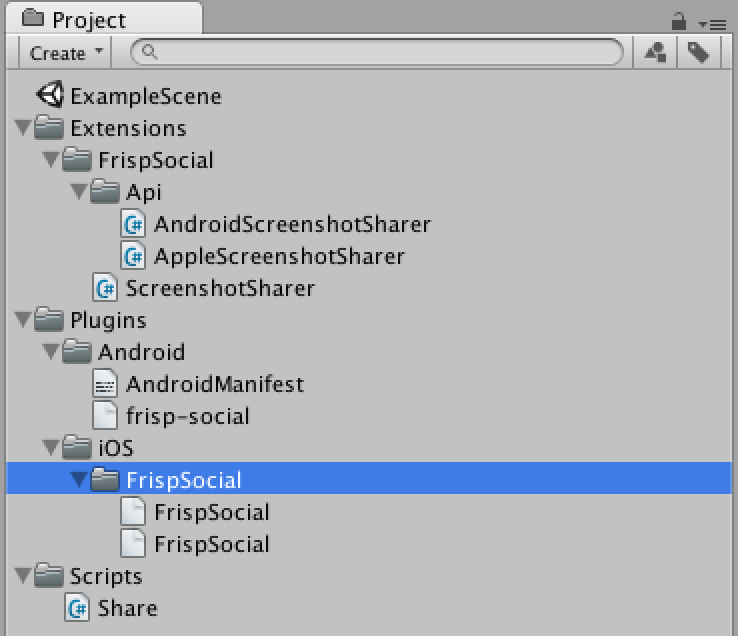
A Unity package is a binary that you can import into a Unity project. The import function extracts the classes that are in the package and copies them into the Unity project. Because the classes are copied into the game it's best practice to make sure you namespace everything and store the classes in folders specific to the package. This way when they are copied over they don't pollute the global namespace or the folder structure. Here is the folder structure I defined for Frisp Social as an example:
When the package is imported into a game it will store all of the Frisp Social specific code under the folder FrispSocial/ and everything is defined under the FrispSocial namespace as shown below.
using UnityEngine;
using System.Collections;

namespace FrispSocial {

  public class ScreenshotSharer : MonoBehaviour {

    private static readonly ScreenshotSharer _singleton
      = new ScreenshotSharer ();

    private ScreenshotSharer() {}

    public static ScreenshotSharer Instance() {
      return _singleton;
    }

    public IEnumerator PostScreenshot(string title, string message) {
      yield return new WaitForEndOfFrame();
      // Create a texture the size of the screen, RGB24 format
      int width = Screen.width;
      int height = Screen.height;
      Texture2D tex =
        new Texture2D( width, height, TextureFormat.RGB24, false );
      // Read screen contents into the texture
      tex.ReadPixels(new Rect(0, 0, width, height), 0, 0 );
      tex.Apply();

      if (Application.platform == RuntimePlatform.Android) {
        Api.AndroidScreenshotSharer.Instance ().ShareImage (
          title, message, tex
        );
      } else if (Application.platform == RuntimePlatform.IPhonePlayer) {
        Api.AppleScreenshotSharer.Instance().ShareImage(message,tex);
      }

      Destroy(tex);
    }
  }
}
The cleanest way I have found to abstract components into Unity packages is to create a new Unity project specific to that component. In this scenario I created a project called frisp-social-unity-asset. Once you have done this move all of the component specific code out of your game into this new project following the same folder structure with Plugins/, Extensions/ etc. I suggest at this point you namespace your classes and put them in specific folders.
Now that we have the libraries we need for the component we need to connect it with an example scene for testing. In this scenario I created the following example class for interacting with the social media libraries under Scripts/:
using UnityEngine;
using System.Collections;
public class Share : MonoBehaviour {
private const string TITLE = "Title";
private const string MESSAGE = "Message";
public void shareScreenShot() {
StartCoroutine (
FrispSocial.ScreenshotSharer.Instance().PostScreenshot(TITLE, MESSAGE)
);
}
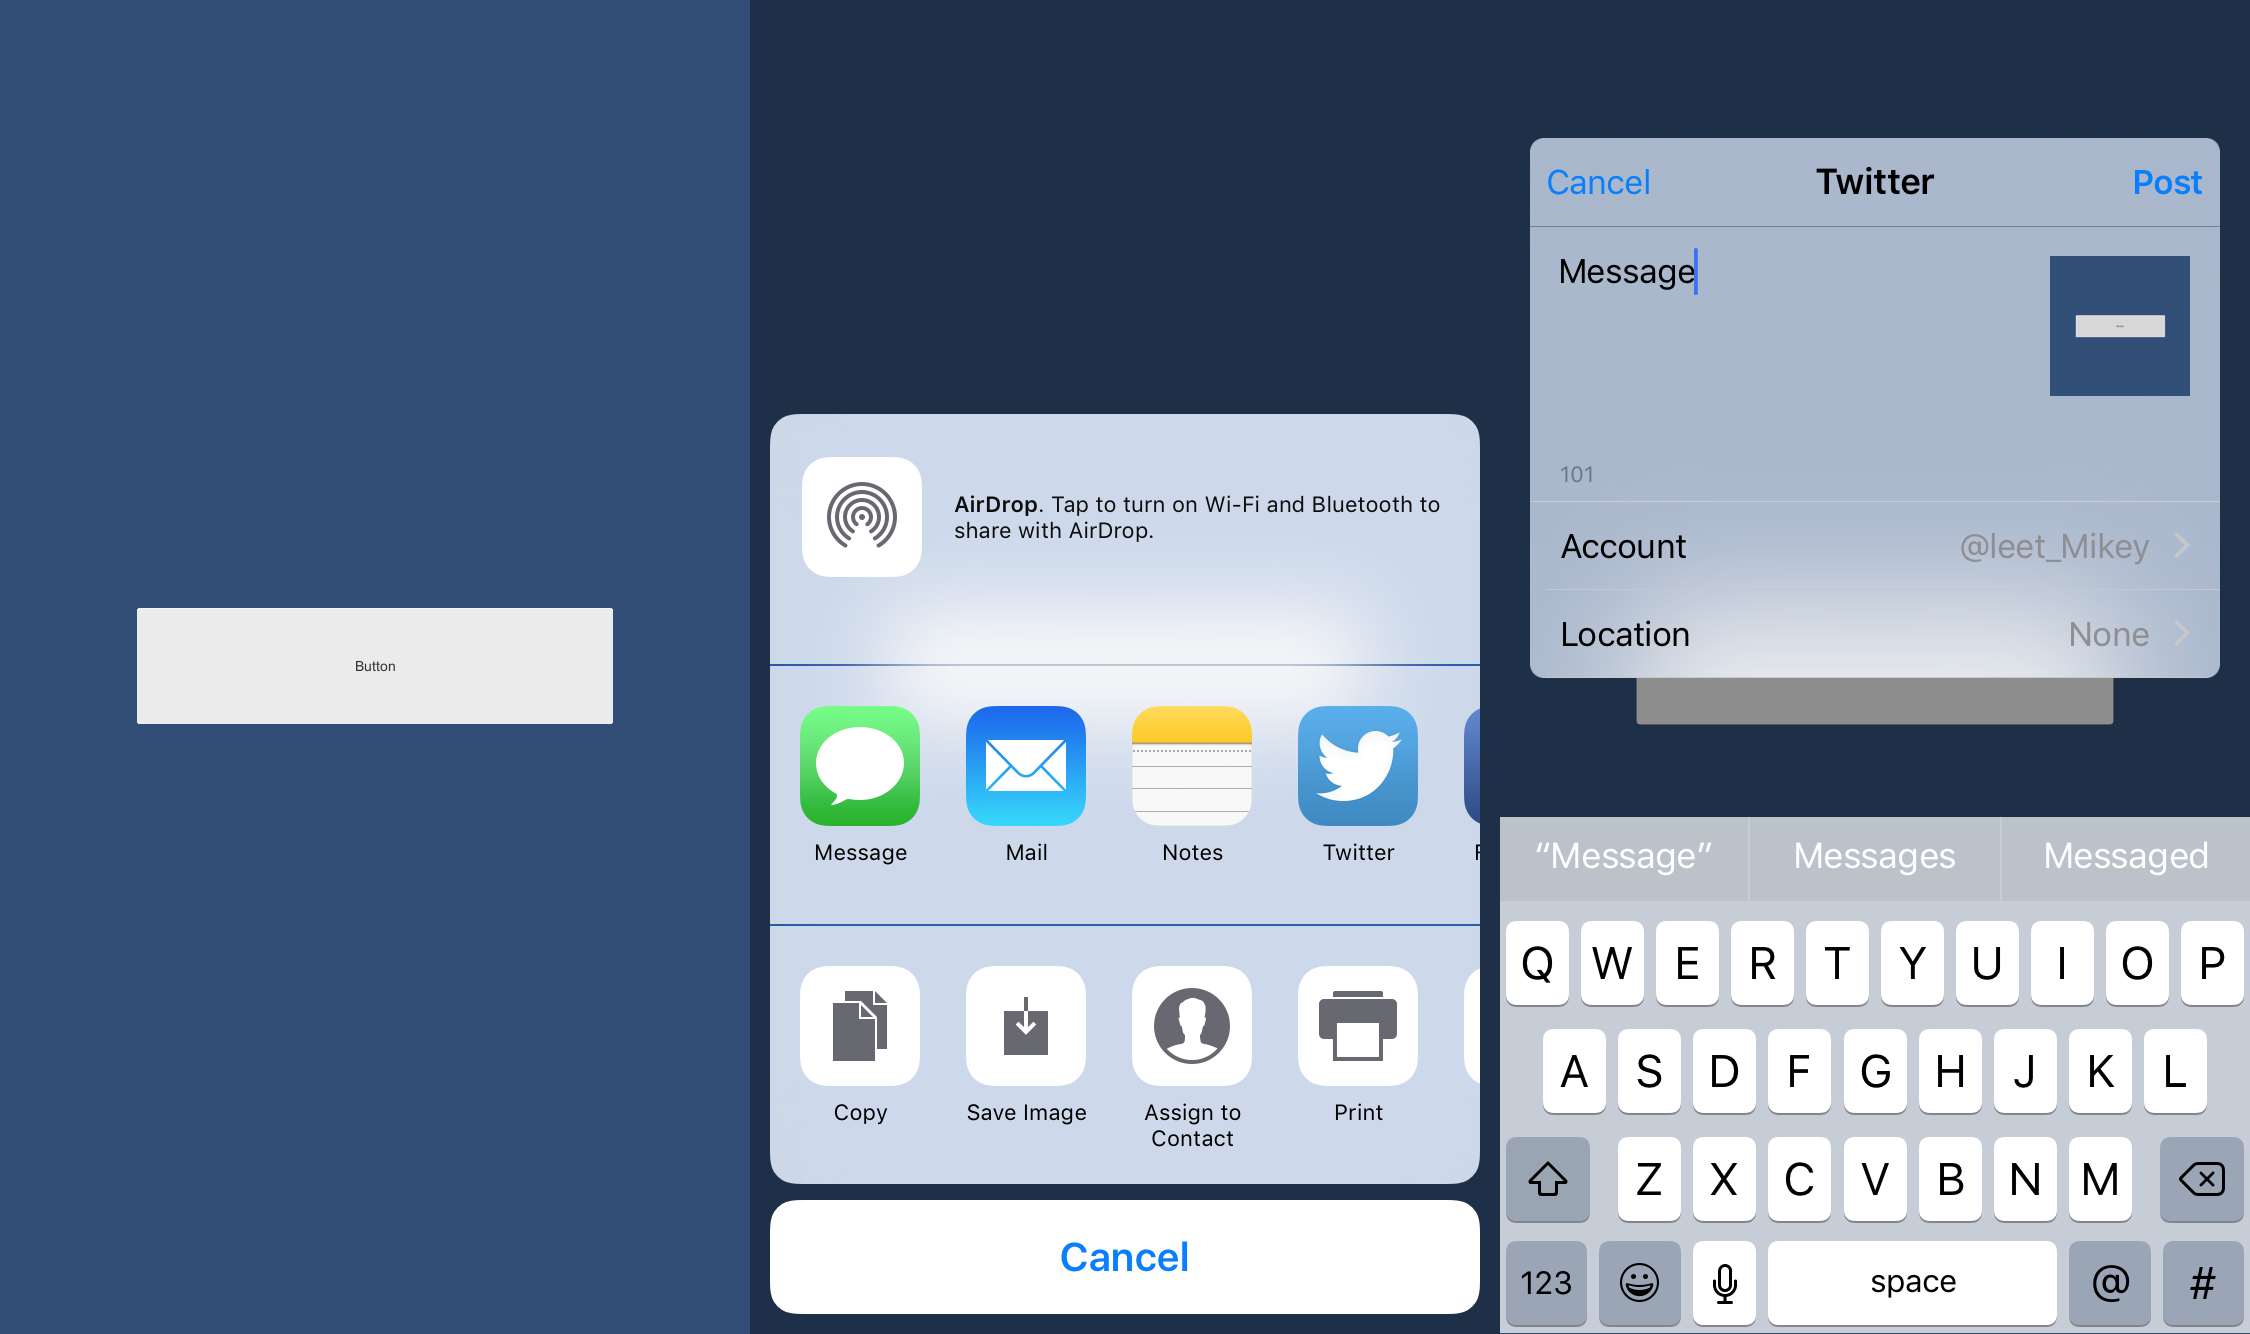
}The next step is to create a game object, attach the script to it, then create a button that triggers the shareScreenshot function. Once that's done we have an isolated bare bones Unity project for testing our component. Let's test it by running it on the iPhone.
Now that we have tested it on the iPhone and everything is working we can export it into a Unity package. This is achieved by going to: Assets -> Export Package... you will then see the following screen:
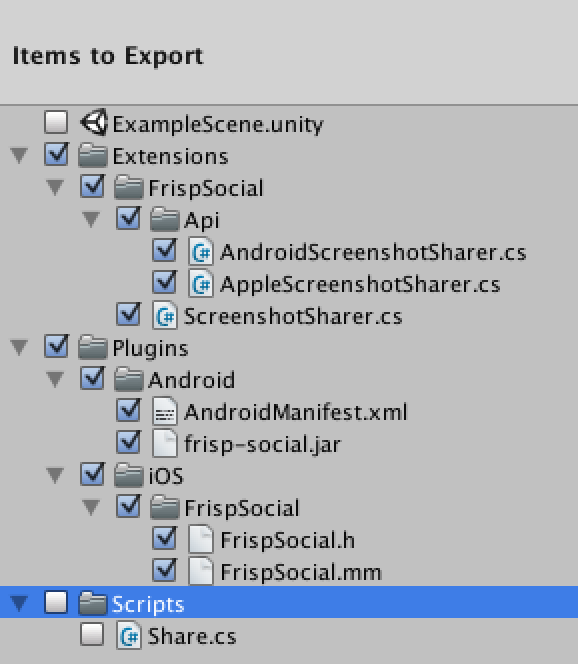
Anything that is not library code should not be included in this package, this includes scenes and scripts under the Scripts/ folder. After clicking export it will create a Unity package binary file which can be imported into any game.
The workflow for making changes to a Unity package is:
Make code changes in package project -> Export as Unity Package -> Import into game project.
The complete code for this example can be found here. Make sure to create a readme for your Unity package explaining how to install it as larger packages can get more complex.